Getting Started with Sudory
This guide walks you through setting up your Sudory account end to end: your organization, your team's sign-in security, who can see and change what, giving your auditor visibility, running your first scan, connecting your first integration, and reading the compliance baseline it produces. Each step is something you do yourself, in order, inside the product.
- 1Organization
- →
- 2MFA
- →
- 3Roles
- →
- 4Auditor
- →
- 5Public scan
- →
- 6Connector
- →
- 7Baseline
Time needed: about 25 minutes, plus the time it takes your invited teammates and auditor to accept their invitations, and whatever a connected provider's own setup screen asks of you.
Already have a login? If we've already created your organization and invited you as its Owner, your account exists: start at Step 2. If you're starting from a blank signup page, begin at Step 1.
Find it in your browser's address bar once you're signed in (/accounts/@your-handle/…), or leave this blank and follow the {your-org} links to your account list instead.
Create your organization
Sign up, then name your organization
/auth/signup → /accounts/create
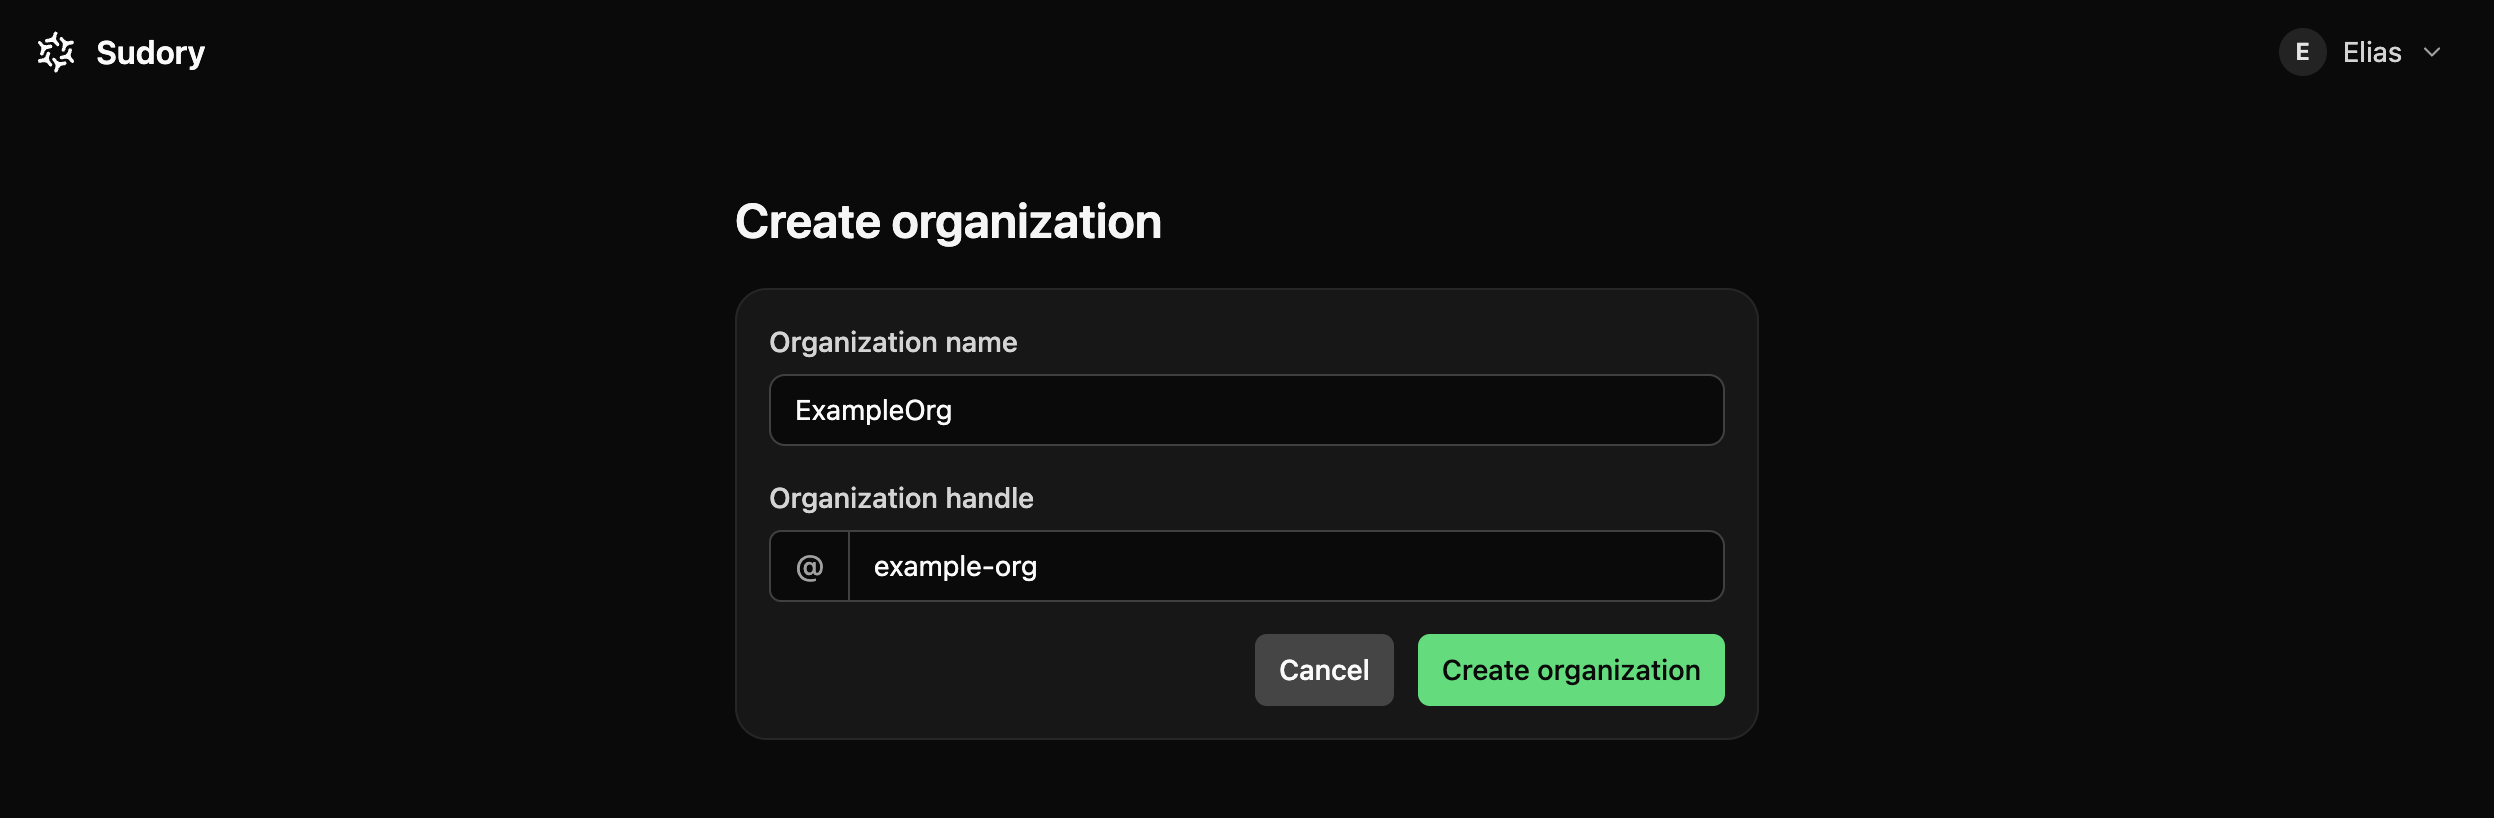
- Go to the Sudory sign-up page and create your user with your work email.
- Choose a name for your organization. Sudory generates a short handle for it (like
@your-org) that you can adjust before continuing. - You land in your new account as its Owner — the role with full control, including billing and the ability to delete the account.
Why it matters
Every piece of data in Sudory, every integration, every finding, belongs to exactly one organization. This is the workspace the rest of this guide sets up.
Turn on multi-factor authentication
Settings → Security
/enroll-mfa · /accounts/{your-org}/settings/security
- Enroll your own account: open an authenticator app, scan the QR code Sudory shows you, and save the recovery codes it gives you somewhere safe.
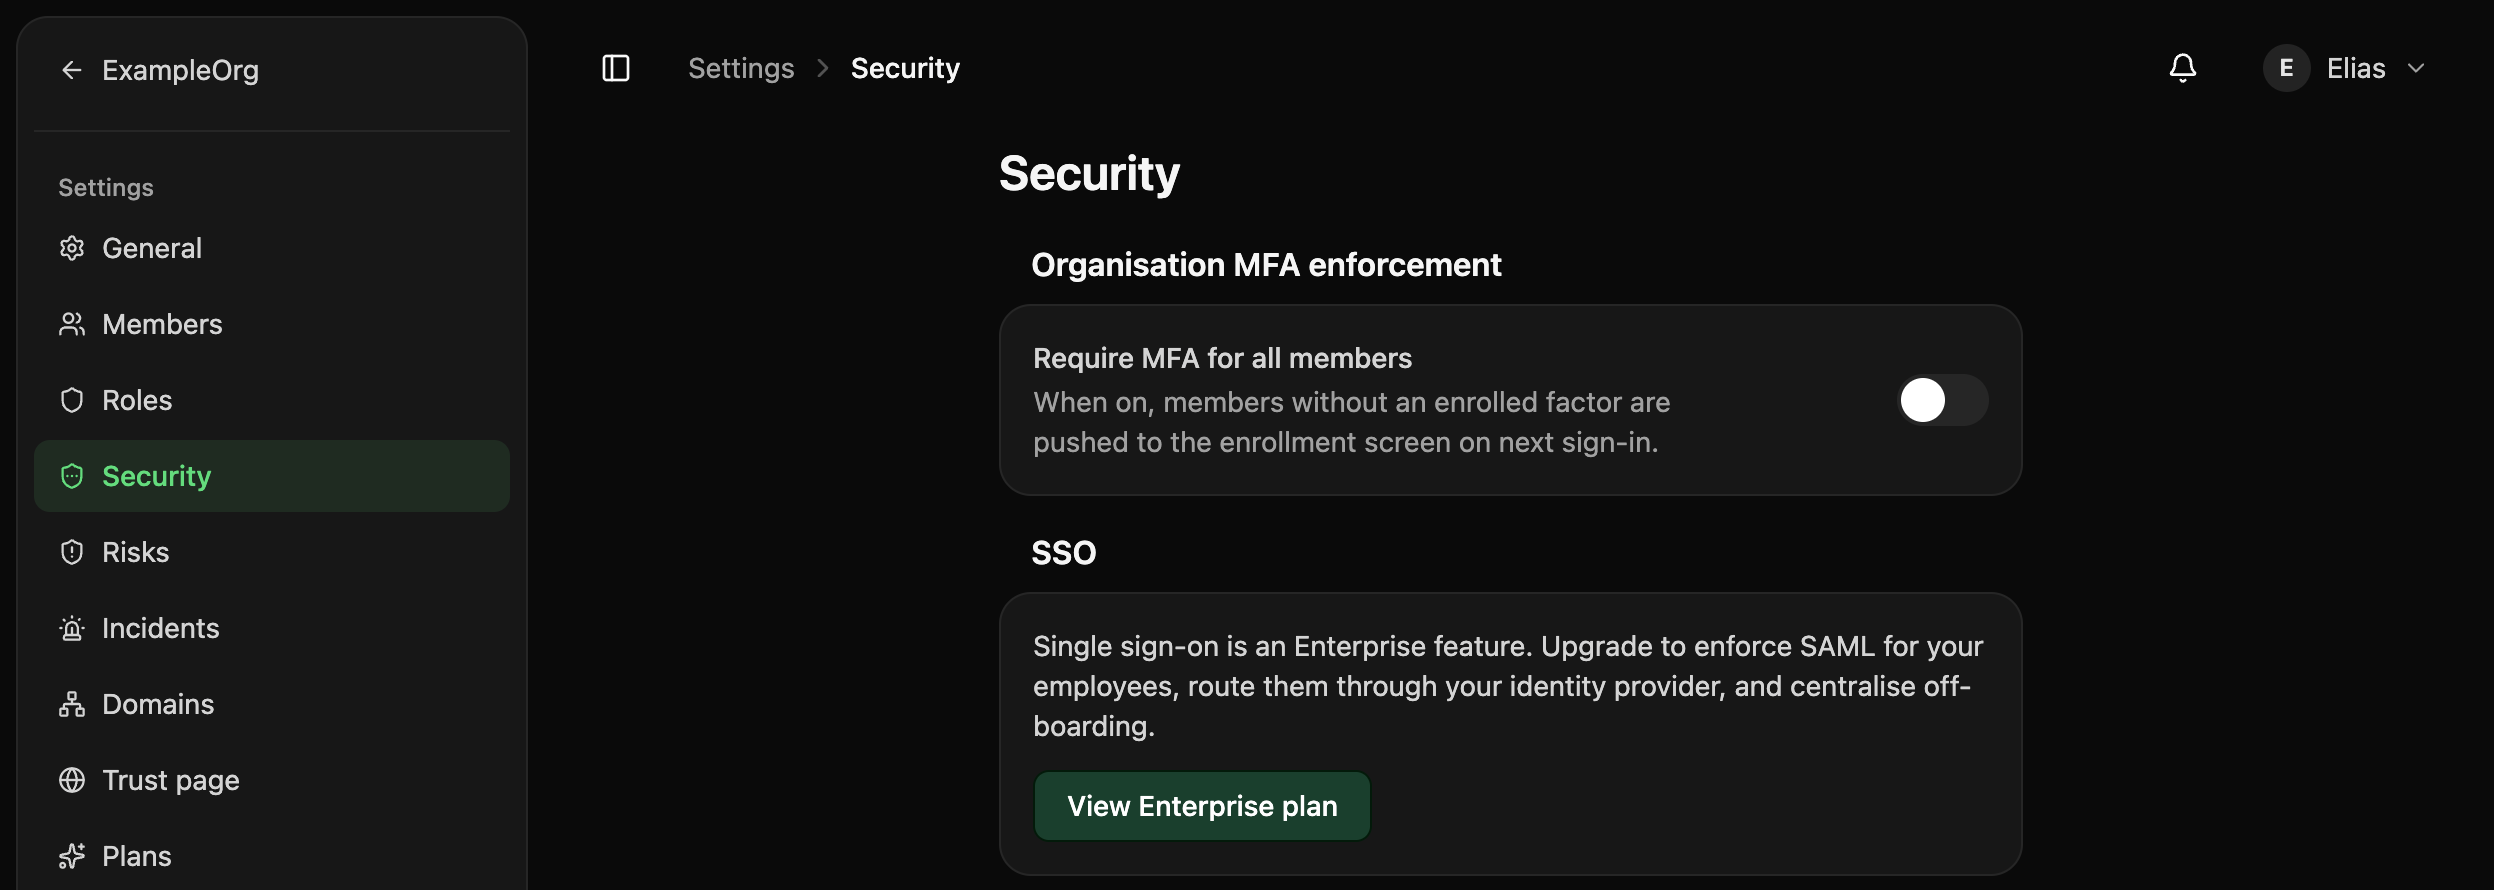
- As Owner, turn on Require MFA in Settings → Security. Every member of your organization will need to enroll their own authenticator before they can sign back in.
Why it matters
MFA is one of the first things an auditor checks. Turning it on here, before you invite anyone else, means every teammate enrolls as part of accepting their invitation instead of as a separate ask later.
This setting governs browser sign-ins. Any long-lived API key your team creates for automation authenticates on its own and isn't affected by it.
Set up roles and invite your team
Settings → Members
/accounts/{your-org}/settings/members
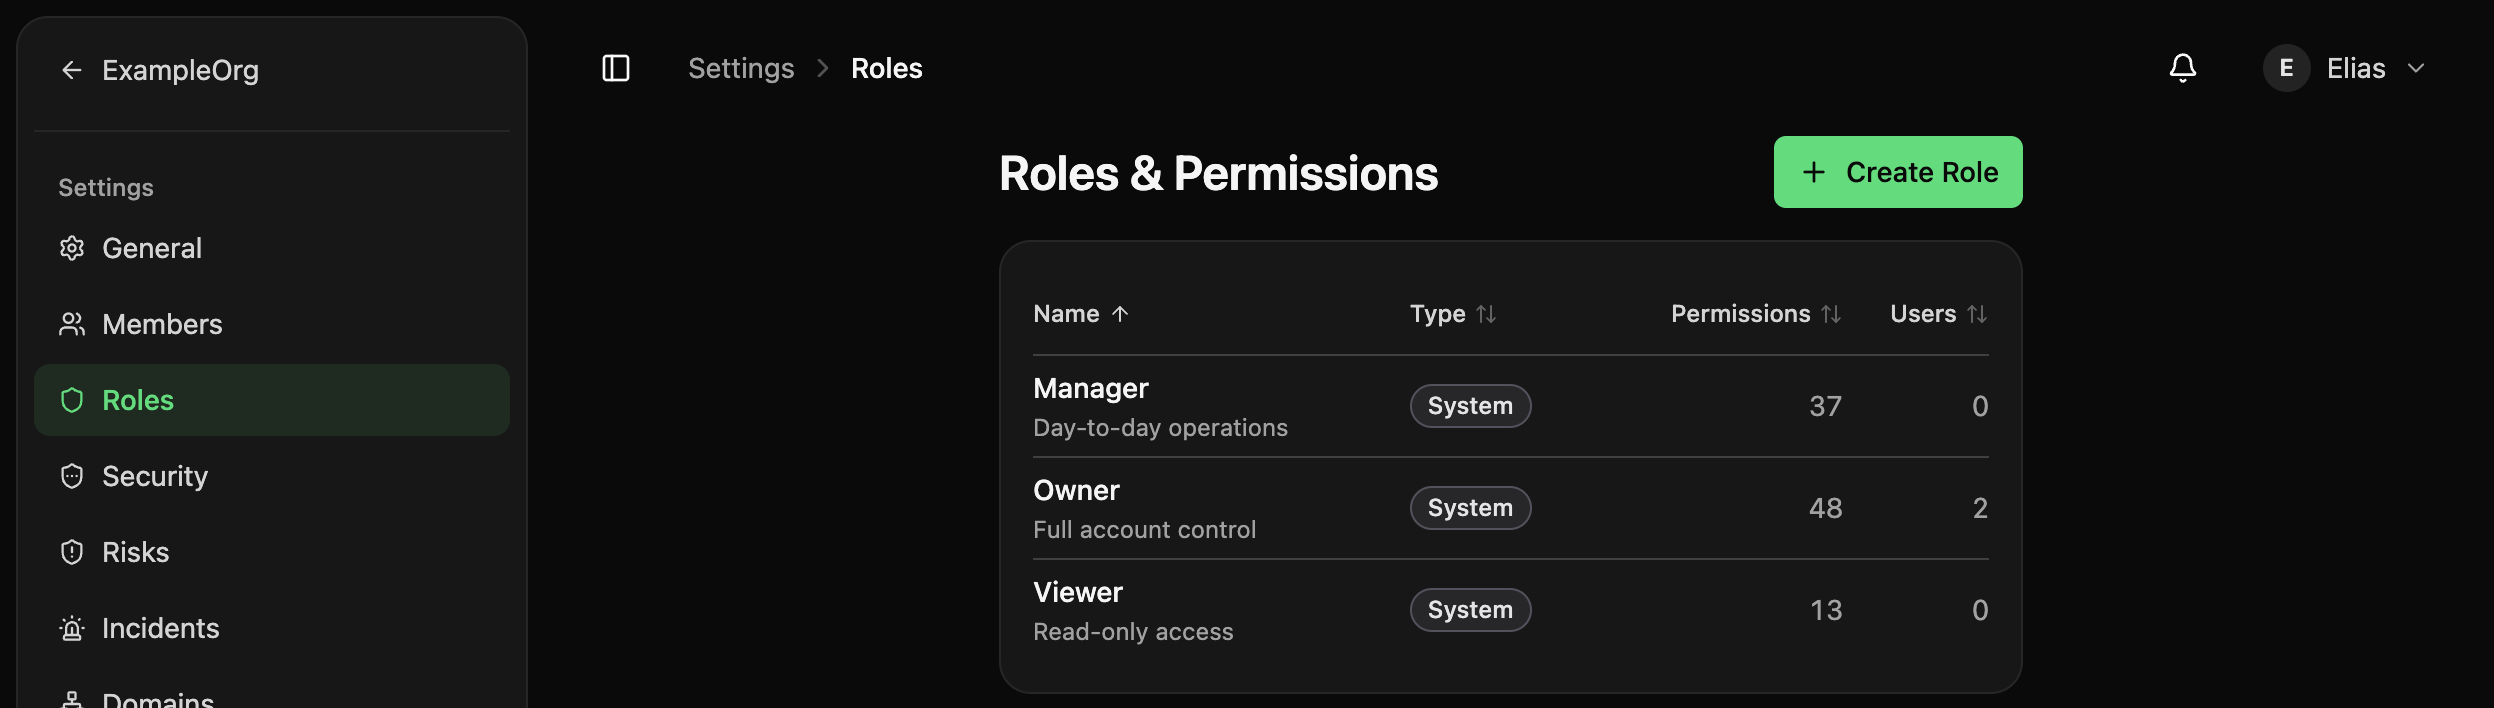
- Decide who needs what: Owner (full control, billing included), Manager (day-to-day work, no billing or role changes), or Viewer (read-only, no billing).
- If none of those fit a team's responsibilities exactly, define a custom role under Settings → Roles (
/accounts/{your-org}/settings/roles) with only the permissions it needs. - Invite each teammate by email from Settings → Members. They receive a link to accept and, once MFA is required, to enroll.
Why it matters
Getting roles right up front is what makes the next step, inviting an outside auditor, safe: they only ever see what their role allows.
Invite your auditor, read-only
Settings → Members
/accounts/{your-org}/settings/members
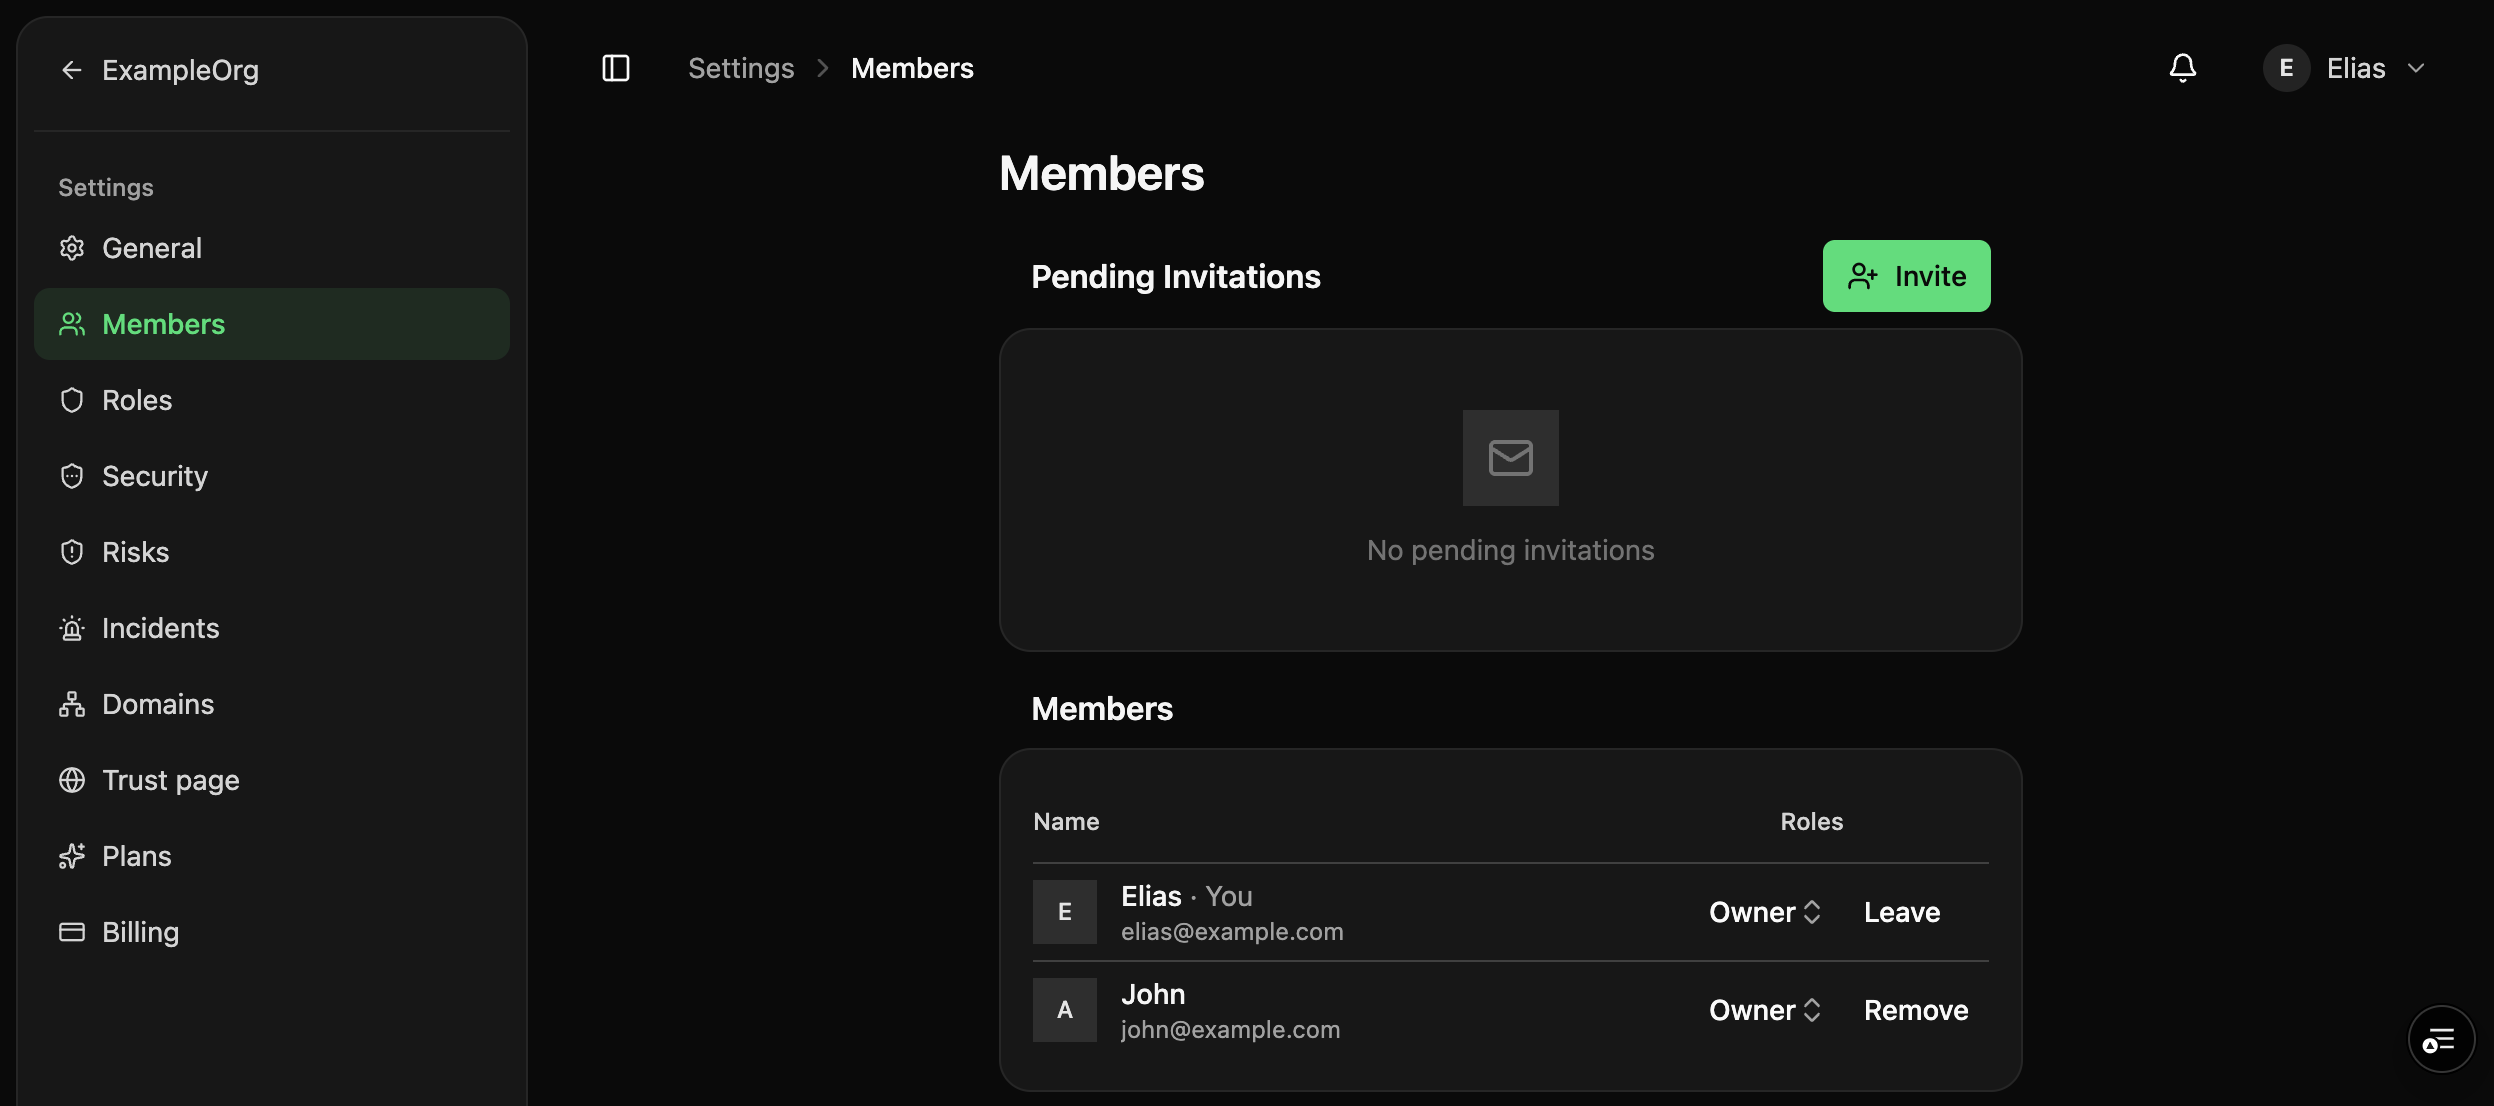
- Invite your auditor the same way as any teammate, from Settings → Members.
- Every invitation is granted the Viewer role by default: full visibility into findings, controls, and evidence, with no ability to change anything and no access to billing.
- If their responsibilities ever grow beyond that, an Owner can upgrade their role later from the same screen.
Why it matters
An external auditor needs to see your compliance posture, not operate your account. Viewer access gives them exactly that, without a separate role to configure.
Run your first public scan
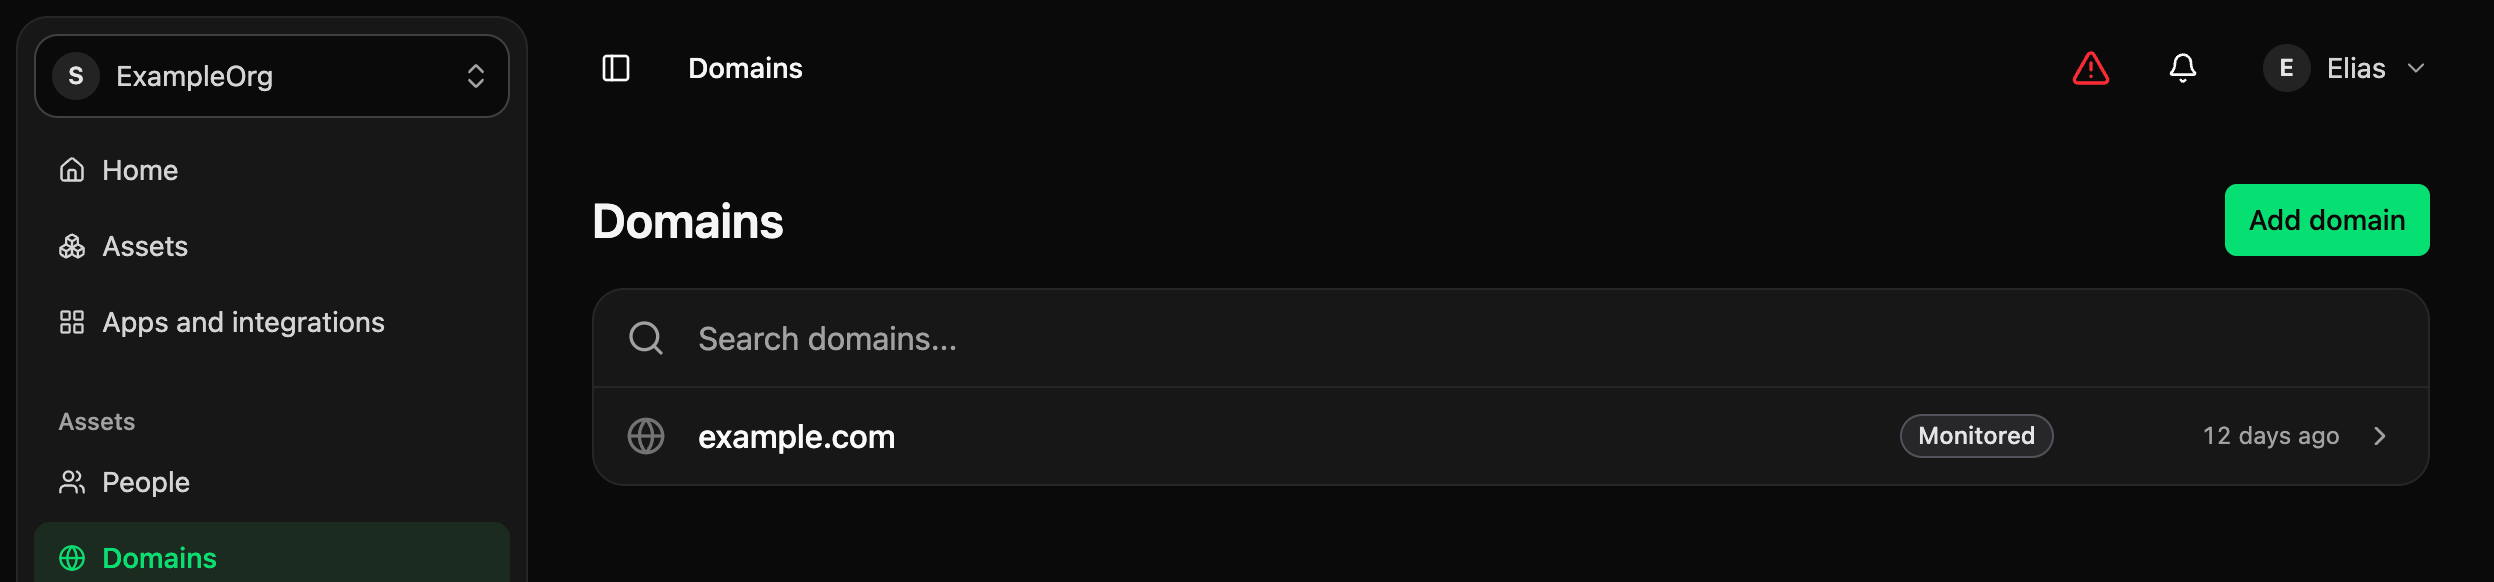
Domains → Add a domain
- Add your primary domain under Domains. Sudory scans what's publicly visible about it — DNS records, email-security configuration, website headers — without needing any credentials from you.
- When you're ready to go further, connect an integration (your cloud provider, identity provider, and so on) under Integrations. Those run deeper, scheduled scans against systems that do require credentials.
Why it matters
The public scan is the fastest way to see Sudory working: no setup beyond a domain name, and results within moments.
Connect an integration
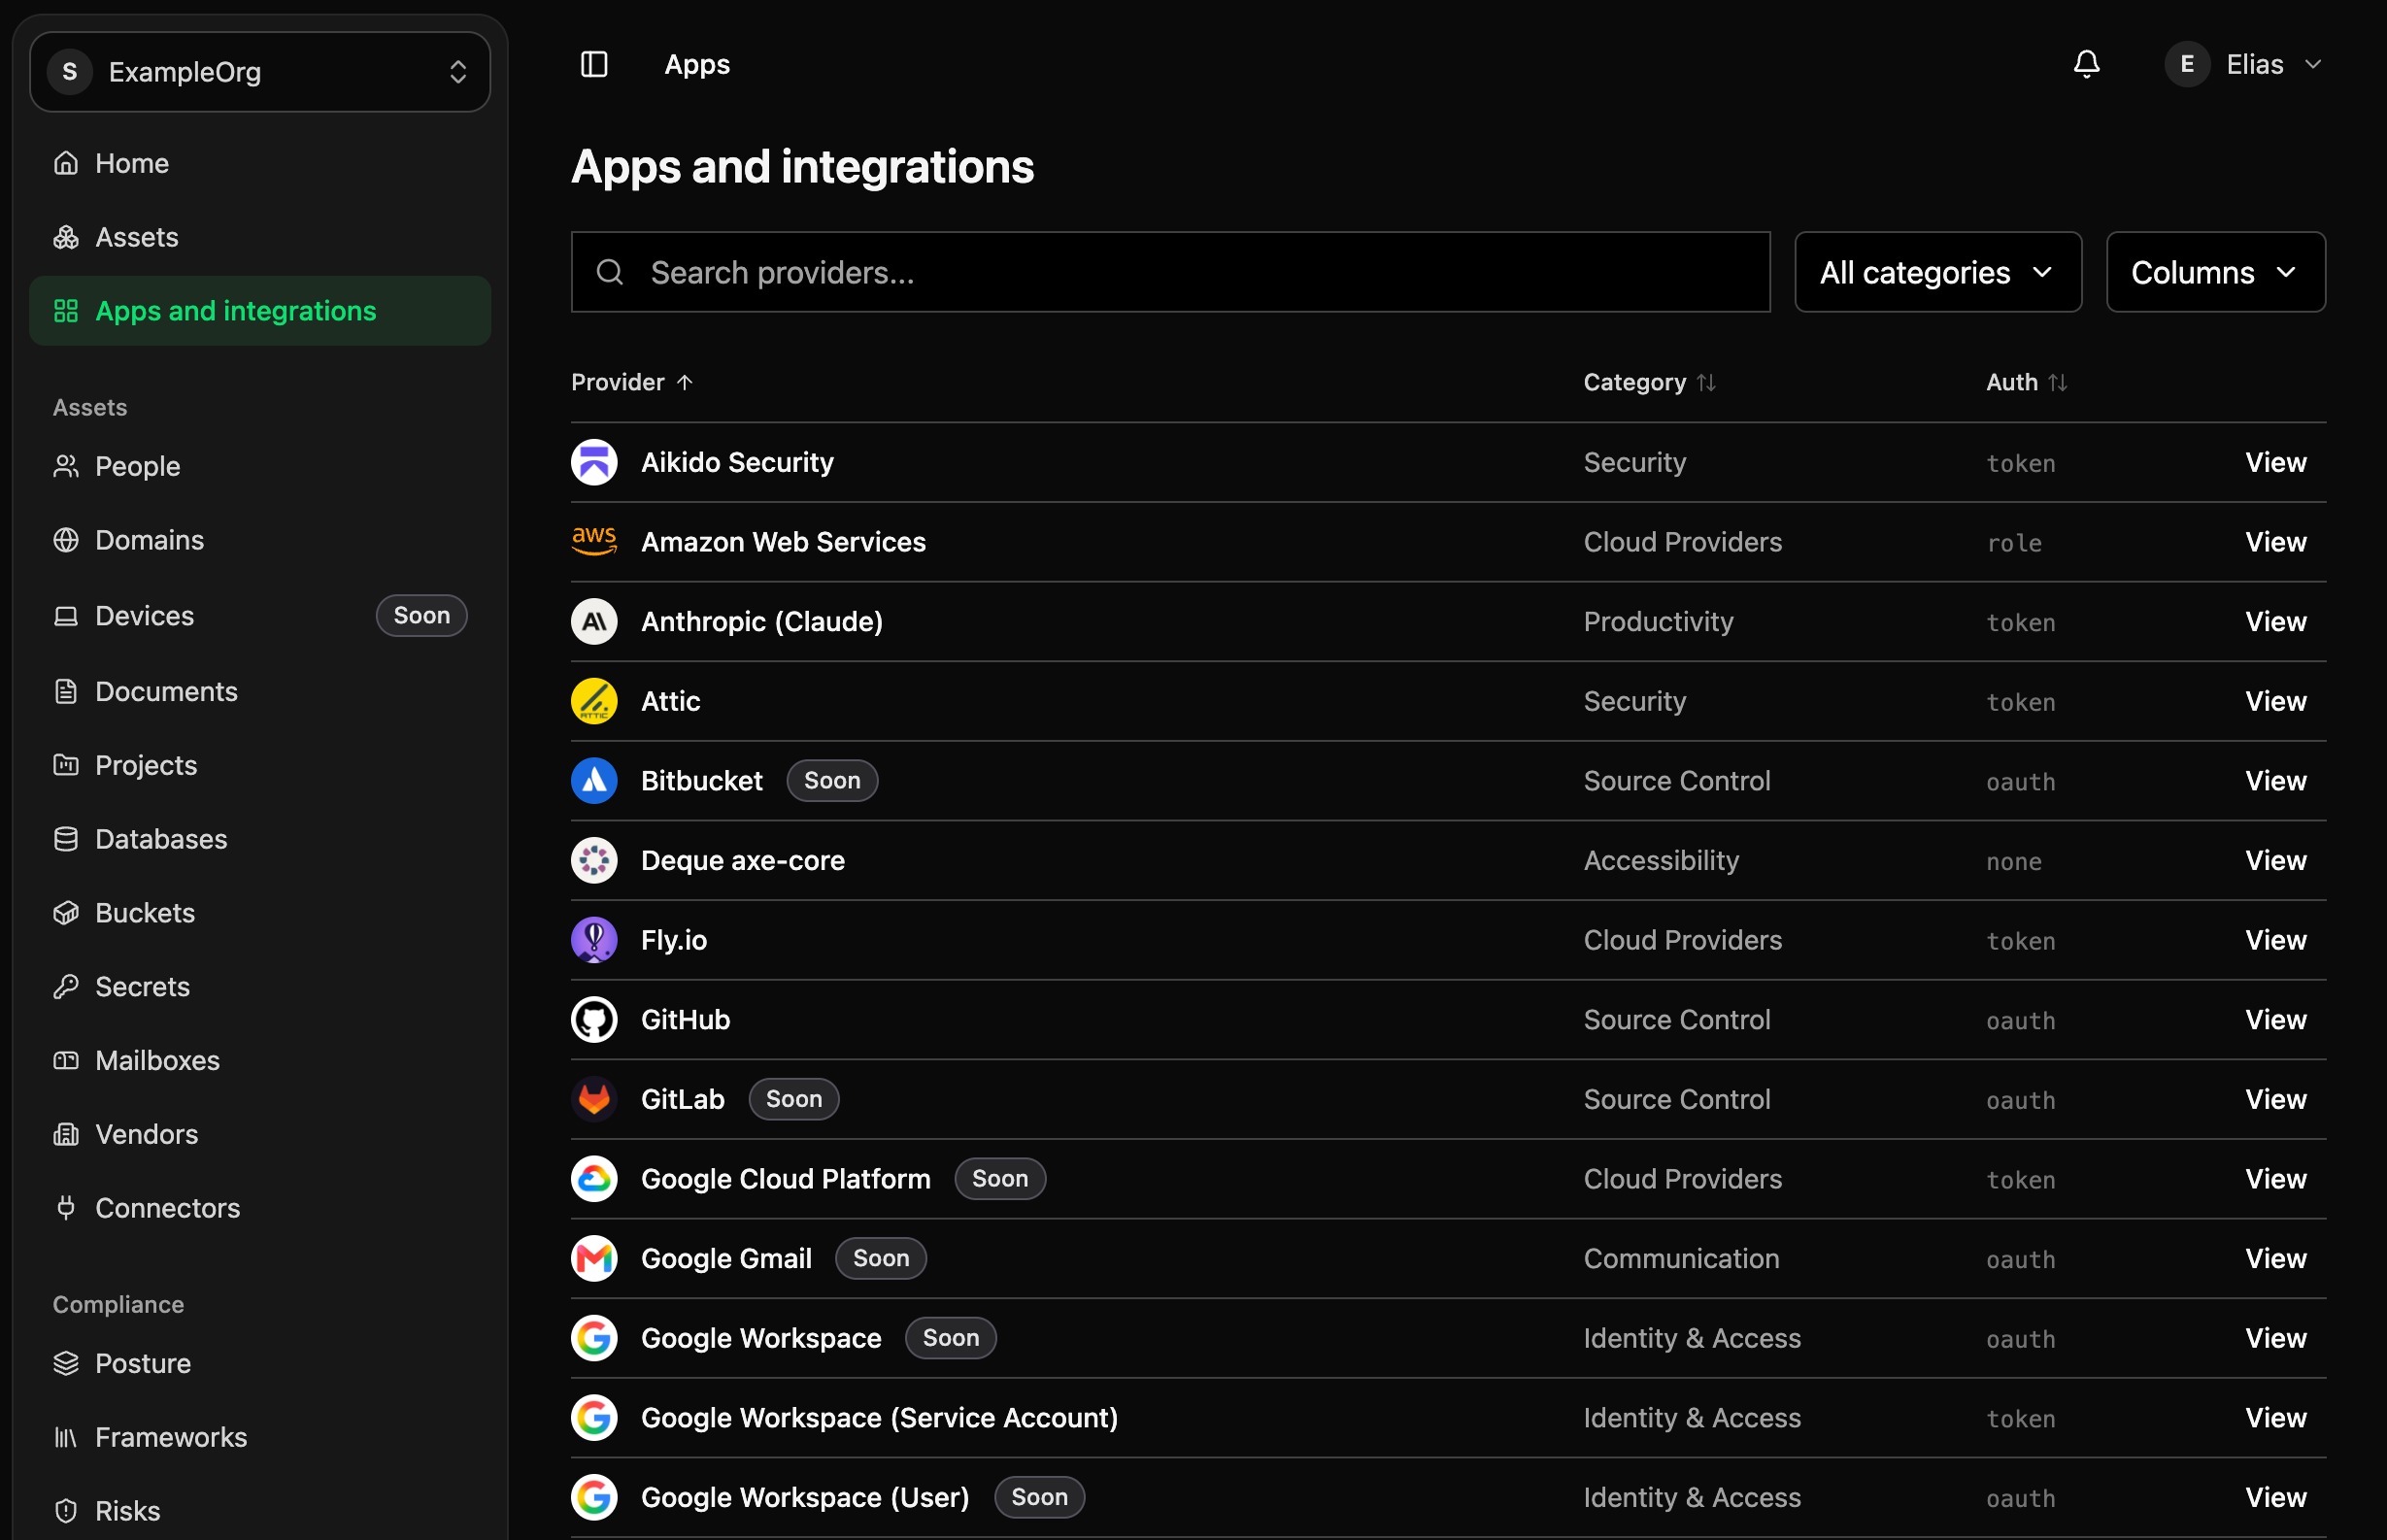
Apps and integrations
- Open Apps and integrations and pick a provider: your cloud account, identity provider, or another system you run.
- Follow that provider's own setup. Most connect through a temporary, revocable access role you create yourself; others use that provider's own sign-in and consent screen. Either way, nothing long-lived is handed over up front.
- Once connected, Sudory runs a scheduled deep scan against it automatically, on top of the public scan from Step 5.
Why it matters
The public scan from Step 5 is a snapshot of what's visible from outside. Connecting an integration is what turns that into ongoing, scheduled coverage of the systems you actually run.
Only an Owner or Manager can connect a new integration; a Viewer, including your auditor, can see what's connected but can't add one — the roles you set up in Step 3 already cover this.
Read your baseline
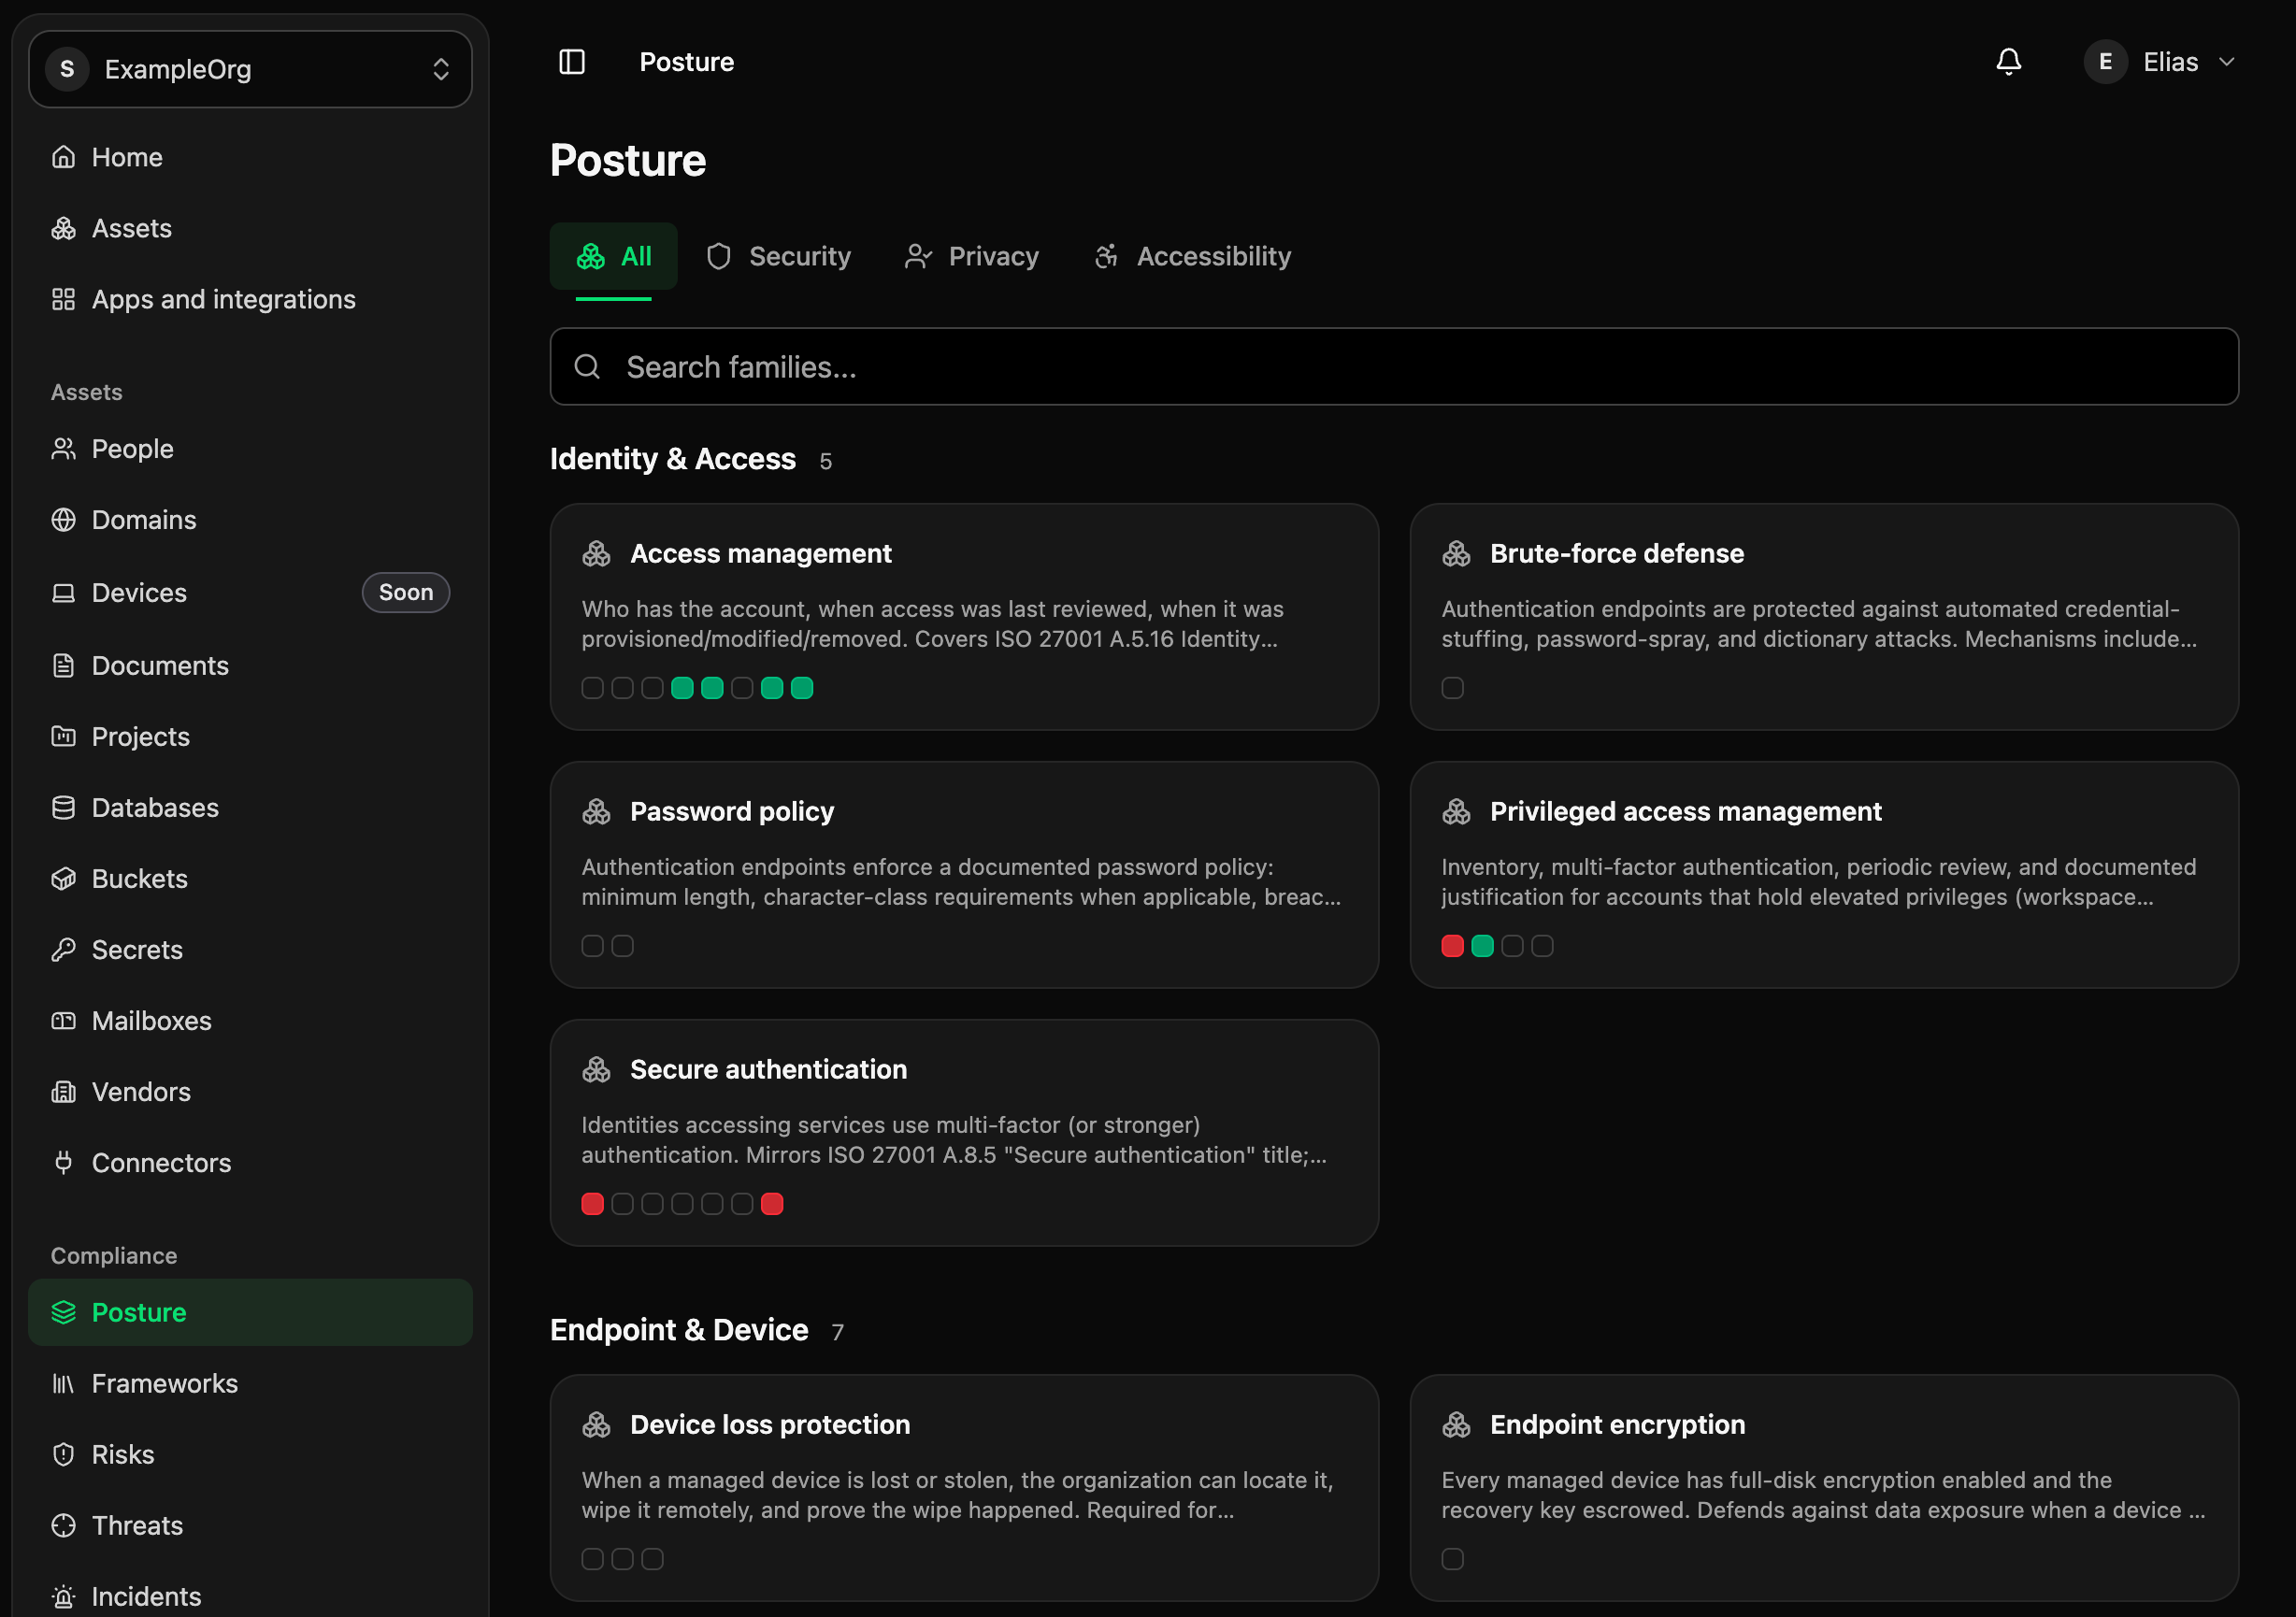
Posture
- Once your public scan and connected integration finish scanning, open Posture to see your findings grouped by family: Security, Privacy, Accessibility.
- This first result is your baseline — the starting picture of where things stand today.
- From here, every framework you adopt, every further integration you connect, and every finding you resolve moves you forward from this baseline, and you'll be able to see that progress over time.
Why it matters
You can't show improvement without a starting point. This is it — and it's also the first thing worth sharing with your auditor once they've accepted their invitation.
What's next
Adopt a framework
Choose a compliance framework to track against (ISO 27001, SOC 2, NIS2, GDPR, and others) and Sudory maps your findings to its controls automatically.
Connect more integrations
Each integration you connect under Integrations extends your deep scan coverage beyond the public scan from Step 5.
Build your asset inventory
As scans and integrations run, Sudory populates your asset inventory automatically, ready for risk and vendor tracking.